How to knit a top down cardigan for kids is the article I wish I had when I first tried my hand at seamless knitting. It can be a little confusing the first time you knit a top down seamless garment. But once you place the markers and work the initial increases you soon see it take shape in front of your eyes, like magic.
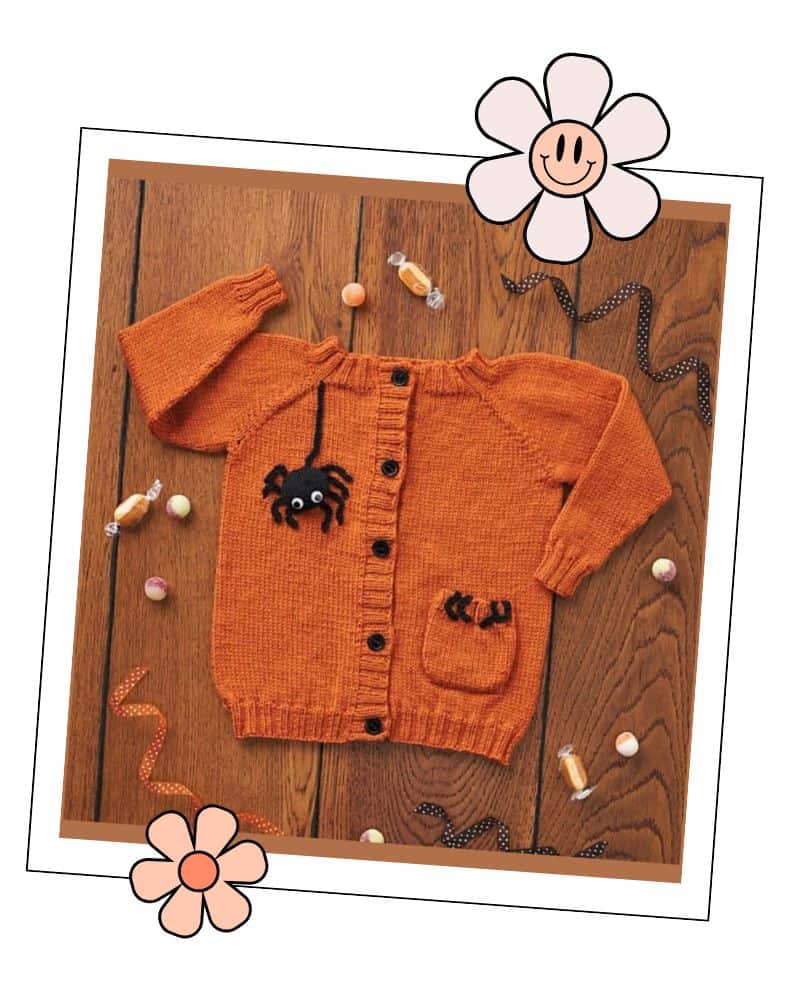
This post is a guide, not a free pattern. To knit along, you will need one of my top down seamless cardigan patterns. The Incy Wincy Spider Cardigan is a great place to start, but any of my top down designs will work. The post was written to help anyone feeling puzzled by seamless construction, and to support you as you work through one of my cardigan patterns.
Quick Look
What you’ll find in this post:
– What top-down seamless raglan construction actually involves
– A full materials list for your top-down cardigan
– Step-by-step photos for every stage from collar to sleeve cuff
– Where to place your markers and what each one is doing
– How to work the raglan increases, including wrong side rows
– How to separate your sleeves and work the body and sleeves separately
How Top Down Cardigan Knitting for Kids Works
A top-down seamless cardigan starts at the collar and grows downward towards the bottom hem. There are no seams to sew at the end. The yoke, body, and sleeves are all connected as you knit, shaped by a technique called raglan construction.
Four markers divide the stitches into five sections: left front, left sleeve, back, right sleeve, and right front. You increase on either side of each marker on every increase row, and those stacking increases form the raglan seams you’d normally have to sew, clever isn’t it?
Once the yoke is the right depth, the sleeve stitches go on hold on a length of scrap yarn and you cast on a small number of underarm stitches. After that, the body and sleeves are worked separately.
I’ve been designing seamless children’s garments for 18 years and this is the construction I keep coming back to. It is the construction I use for my Dachshund in the Snow Cardigan and all my other top-down seamless children’s patterns.
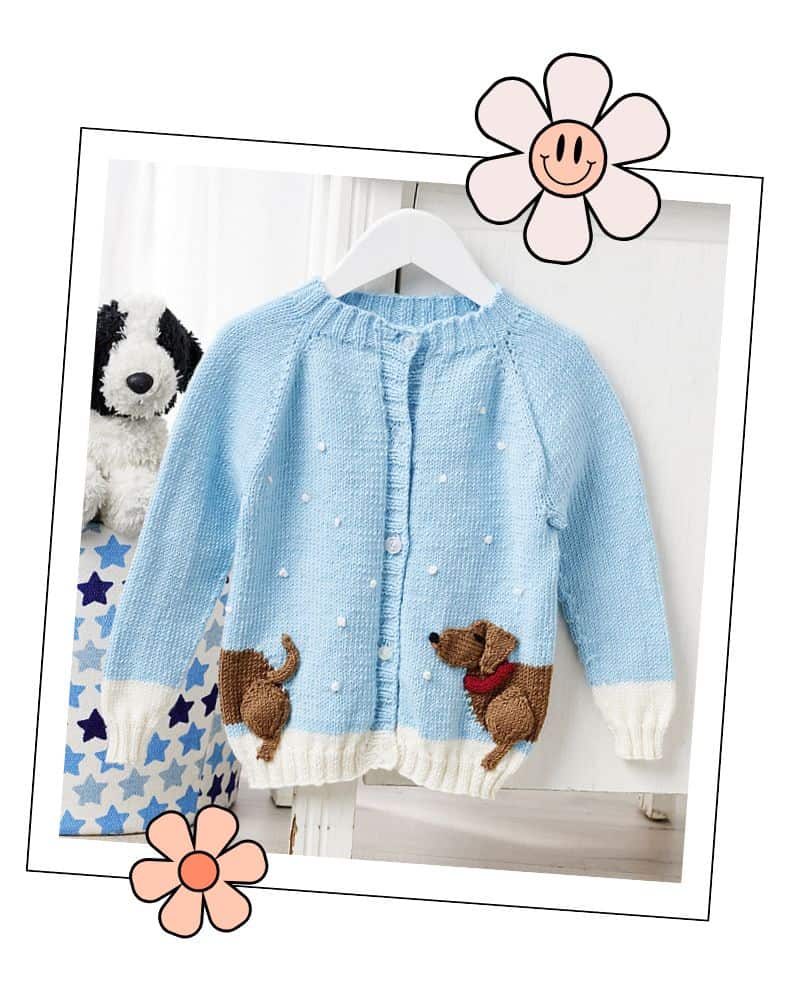
Table of Contents
What You Will Need
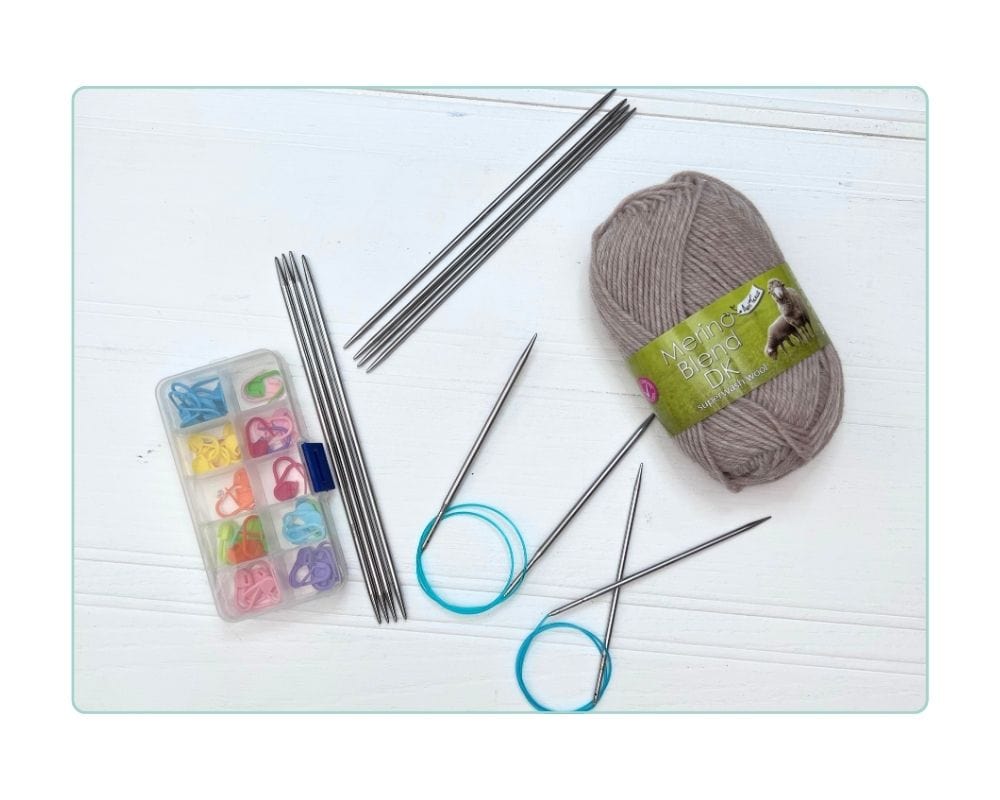
For a DK weight top-down raglan cardigan you will need:
– 3.25mm circular needles, 80cm cable (collar rib and hem rib)
– 4mm circular needles, 80cm cable (yoke and body)
– 4mm circular needles or DPNs, 40cm cable (sleeves)
– DK weight yarn in two colours — the pattern uses King Cole Merino Blend DK
– Four stitch markers, ideally a different colour or style from each other so you can spot them quickly
– Smooth waste yarn or a spare circular needles for holding sleeve stitches
– Tapestry needle for weaving in ends
The worked examples in this guide use King Cole Merino Blend DK and the needle sizes from my Dachshund in the Snow children’s cardigan pattern. Your own pattern will specify the exact needle sizes and yardage for your yarn and size.
I’d recommend having your waste yarn cut and ready before you reach the separation row. It’s considerably less fiddly than hunting for it mid-knit.
Would you like a blog post about all the different ways you can make yarn bobbins for your intarsia projects? Drop me a comment and let me know.
Let’s Get Started
Step 1: The Collar
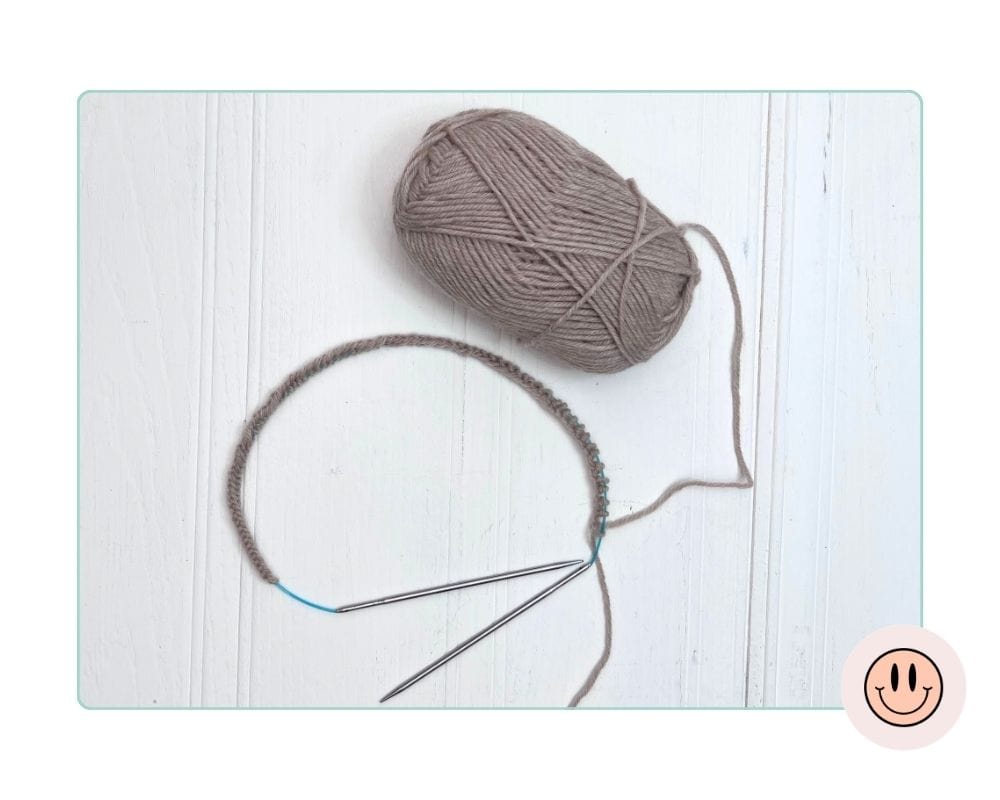
Cast on your stitches on 3.25mm circular needles. For Dachshund in the Snow, the cast-on is 82 stitches for the smallest size.
This is a flat cardigan, not a jumper. You will be working back and forth on the circular needles throughout, not joining in the round at this stage.
Work ribbing as instructed for your chosen size.
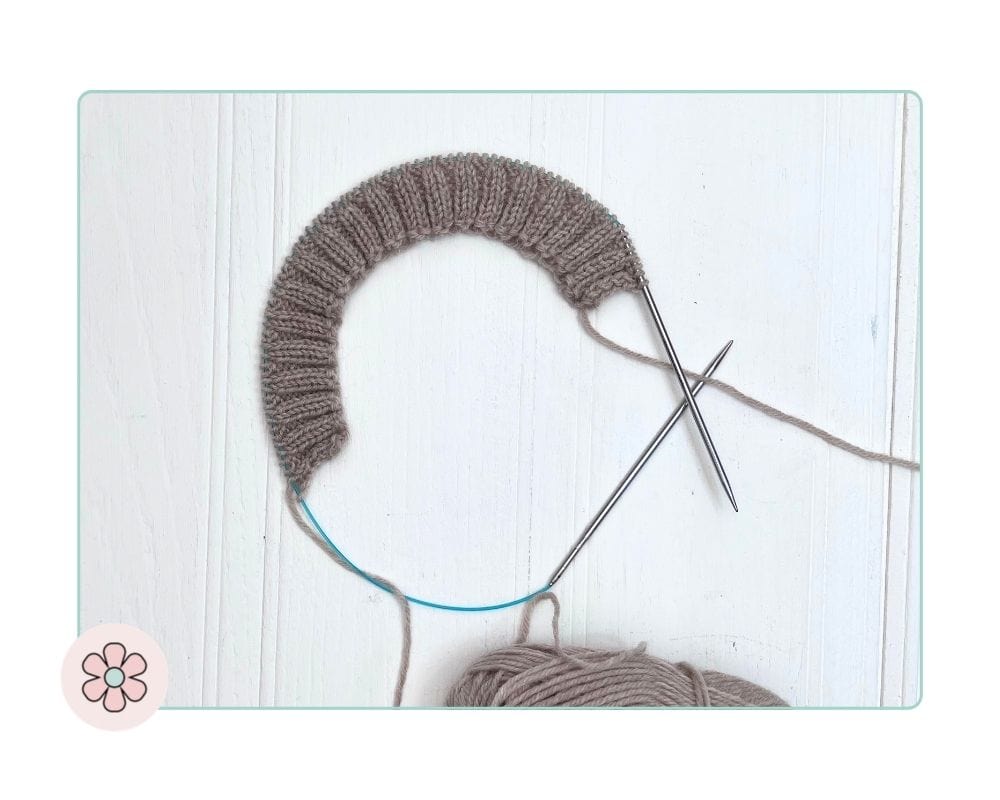
The finished collar looks like a short band of rib. It won’t look like much yet. That is exactly what it should look like at this point.
Step 2: Placing Your Markers
This is the row where the cardigan starts to take shape. Work it carefully and count your stitches as you go.
With the wrong side facing, work a set-up row in purl, placing four markers as instructed. The markers divide your stitches into five sections: left front, left sleeve, back, right sleeve, right front.
For the smallest size of Dachshund in the Snow, the breakdown is 12 front stitches, 14 sleeve stitches, 30 back stitches, 14 sleeve stitches, 12 front stitches.
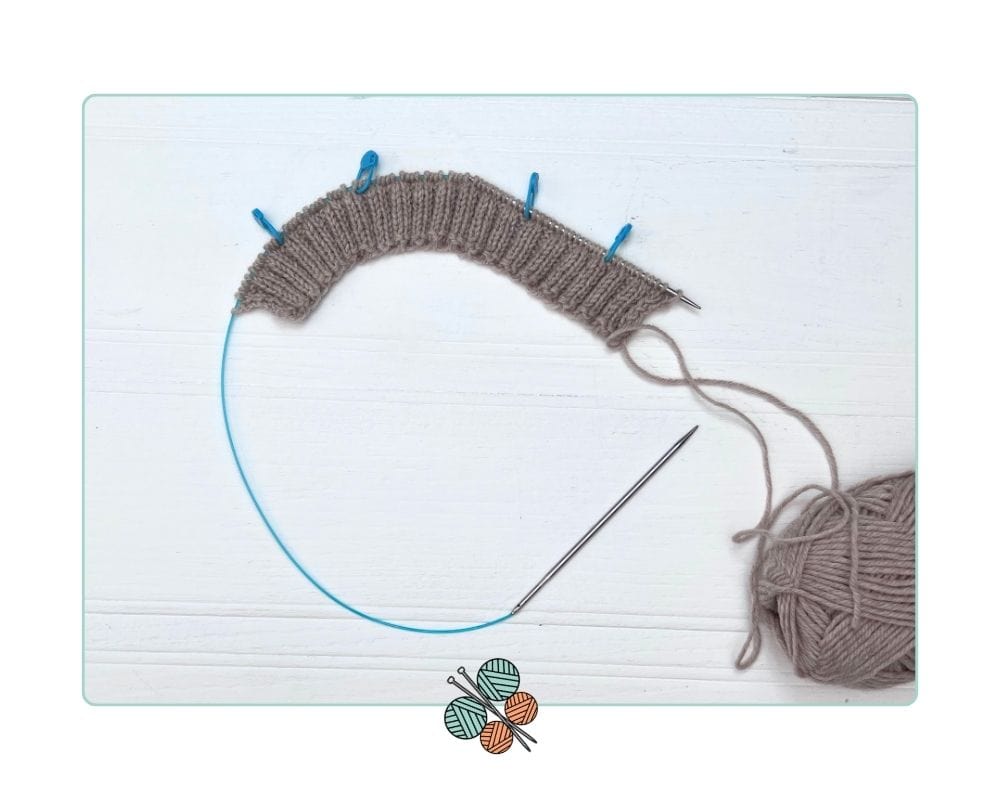
When you’ve worked this row, you have four markers sitting on the needle between each section. Each marker sits at a raglan point. These are the four positions where you’ll increase on every increase row.
Switch to your 4mm circular needles now. You won’t go back to the 3.25mm until the hem and cuff ribbing.
Step 3: The Yoke and Raglan Increases
The increases build the yoke and create the raglan lines. The method I use here is KFB, knit into the front and back of the same stitch. You work two increases at each marker, one before and one after, so every increase row adds eight stitches in total.
Not sure what KFB means? See the Knitting Abbreviations Guide
Right side increase row:
Knit to two stitches before the first marker, KFB, k1, slip marker, k1, KFB. Repeat this at each of the four markers. Knit to end. Eight stitches increased.
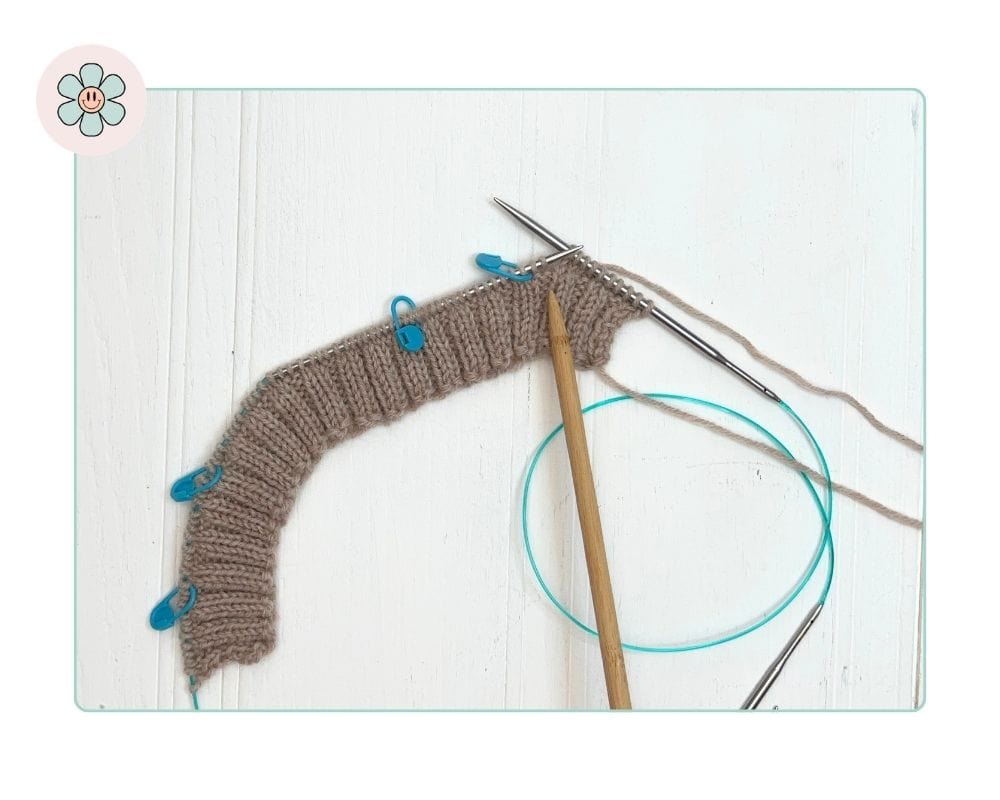
The image shows the point of the first increase before the marker, this is worked two stitches before the marker.
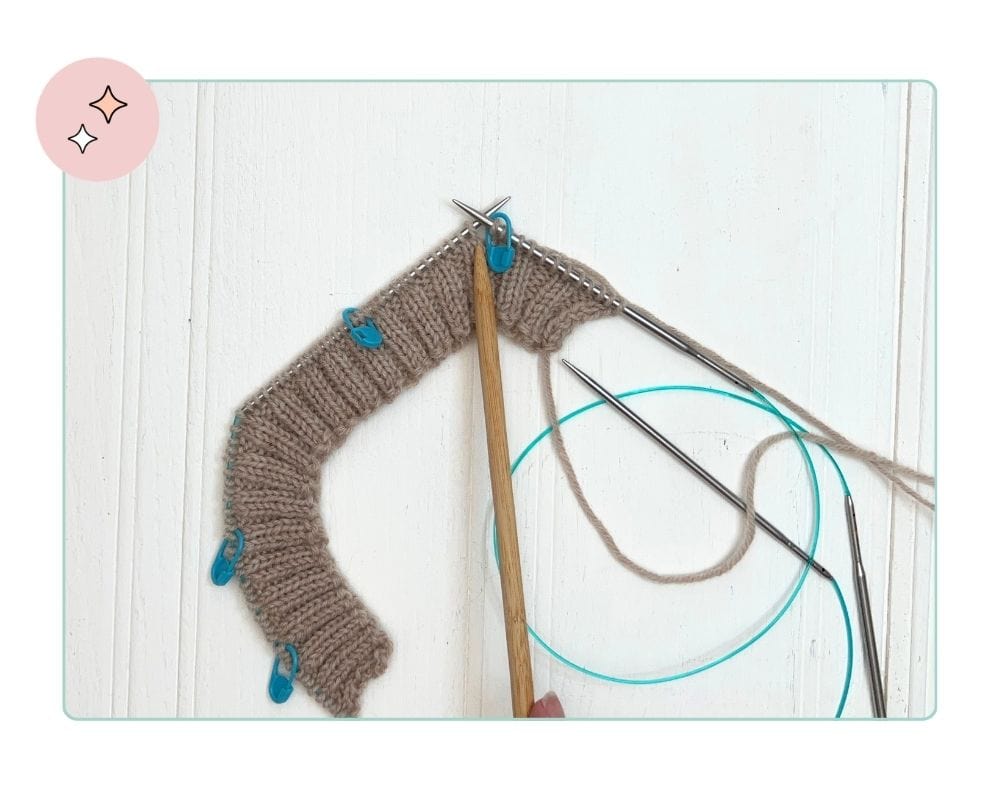
Image shows slipping the raglan marker
At the beginning of the yoke, you also increase on wrong side rows. The WS increase row works the same way but in purl: PFB instead of KFB, two stitches before and after each marker. This double-increase rate in the early rows builds the shoulder shaping without the need for back neck short rows.
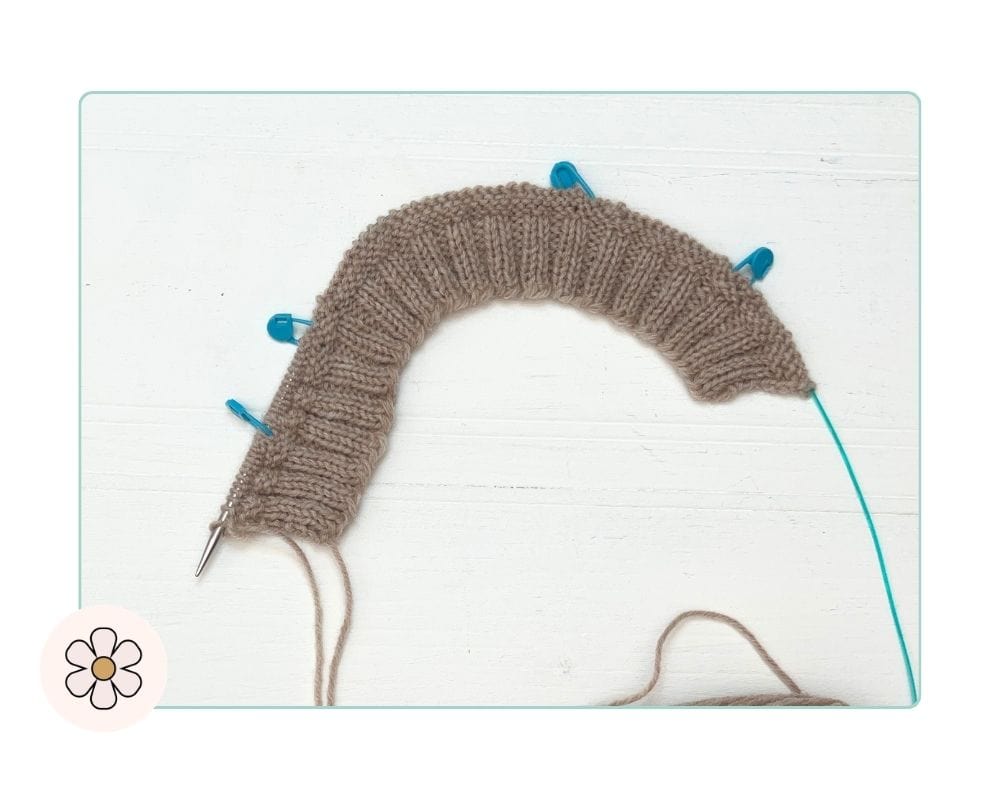
Image shows wrong side view of a top-down children’s cardigan after the first increase rows, raglan shaping beginning to form
After the initial section of paired RS and WS increases, the pattern switches to right side increase rows only. Your pattern will tell you exactly how many of each to work for your size.
Continue working until all the increase rows are done. The pattern gives the total stitch count for your size and the yoke depth to measure to. When both match, you are ready to separate the sleeves.
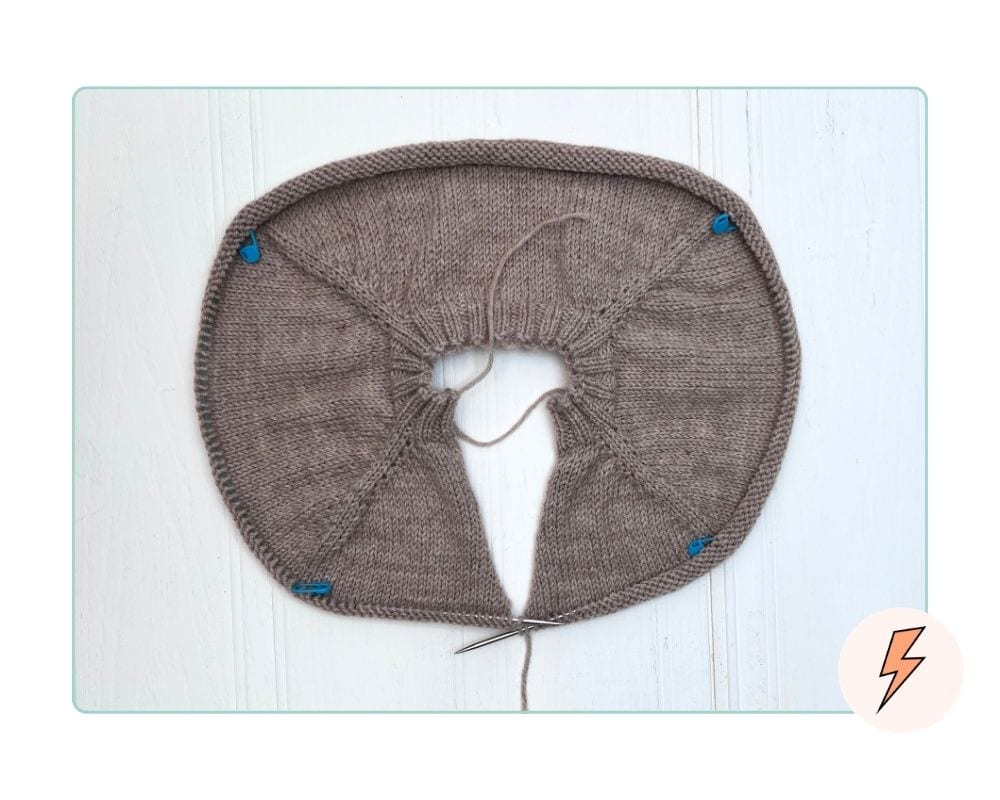
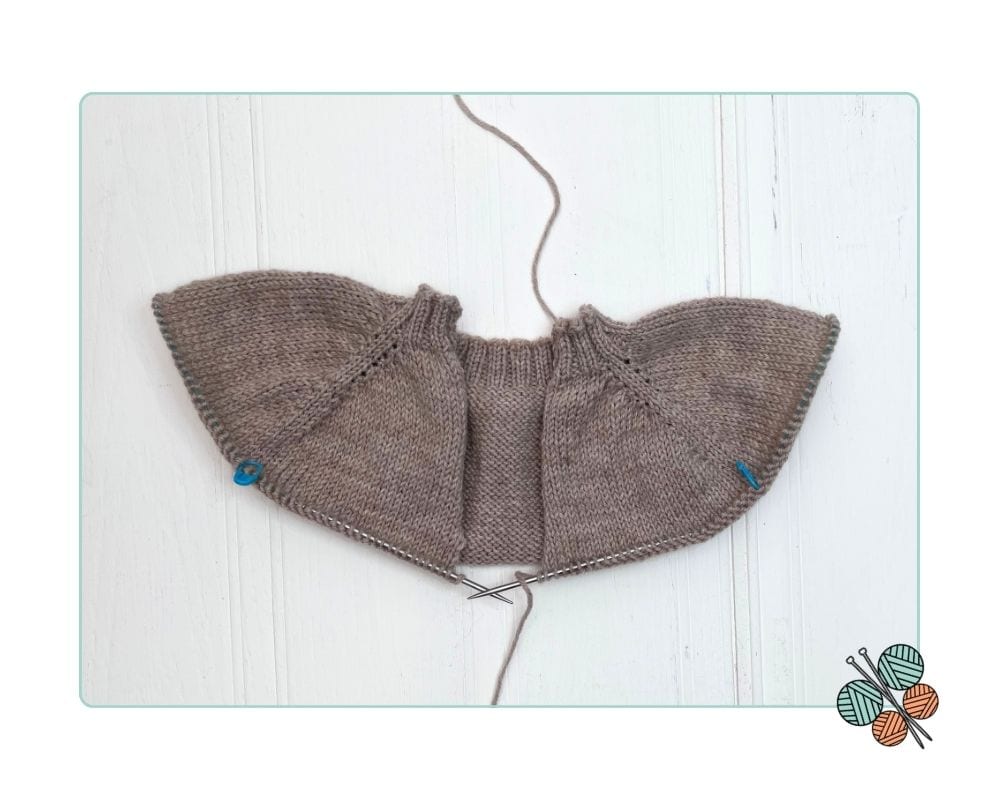
Image shows raglan increases complete on a top-down seamless cardigan for children, yoke at full depth before separation
If your pattern includes a colourwork motif in the yoke, it will look upside down on the needles as you work it. That is correct the FAQ at the bottom of this post explains why.
Step 4: Separating the Sleeves
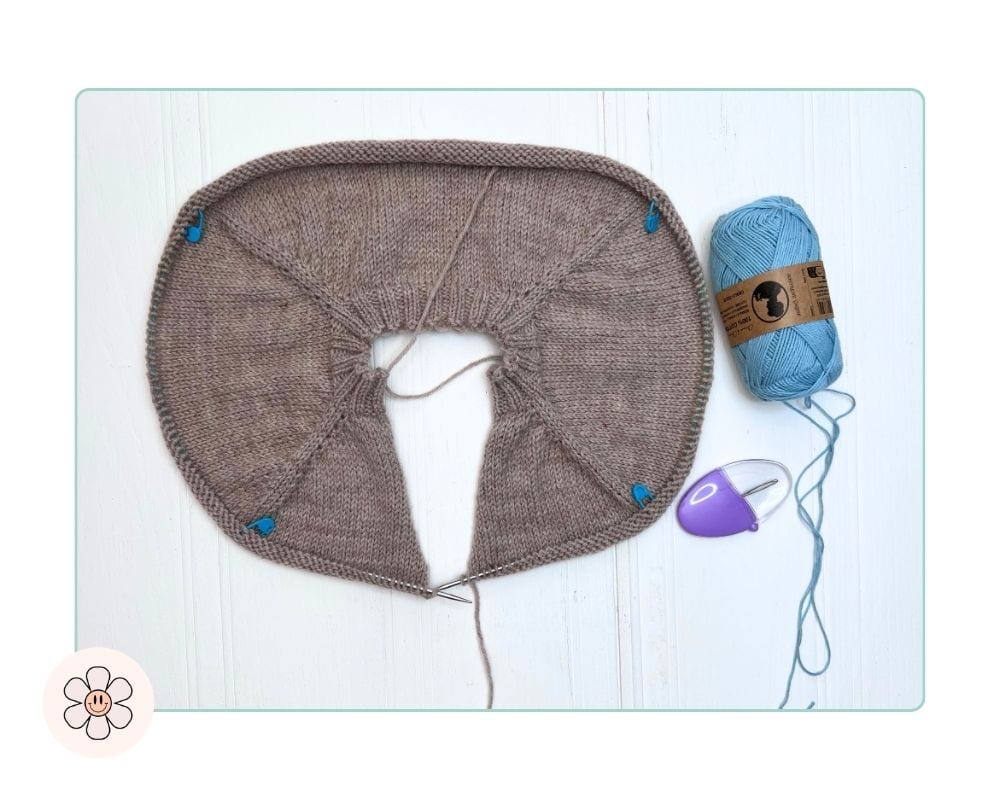
This is the row that turns the yoke into a garment. Trust the process, the magic is about to happen.
Work across the right side to the first marker. Remove the marker.
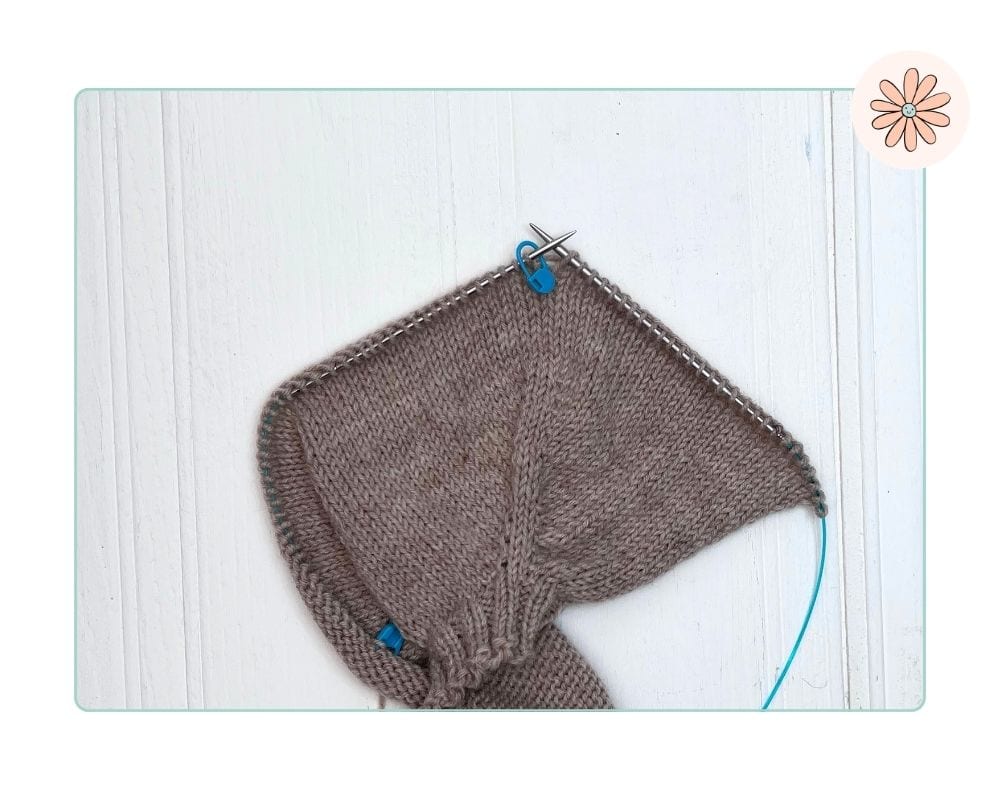
Image shows knitting to the first raglan marker on the sleeve separation row of a top-down children’s cardigan
Cast on a small number of stitches for the underarm using a cable cast-on. For Dachshund in the Snow this is 4 stitches for the smallest size. Then knit straight across the back.
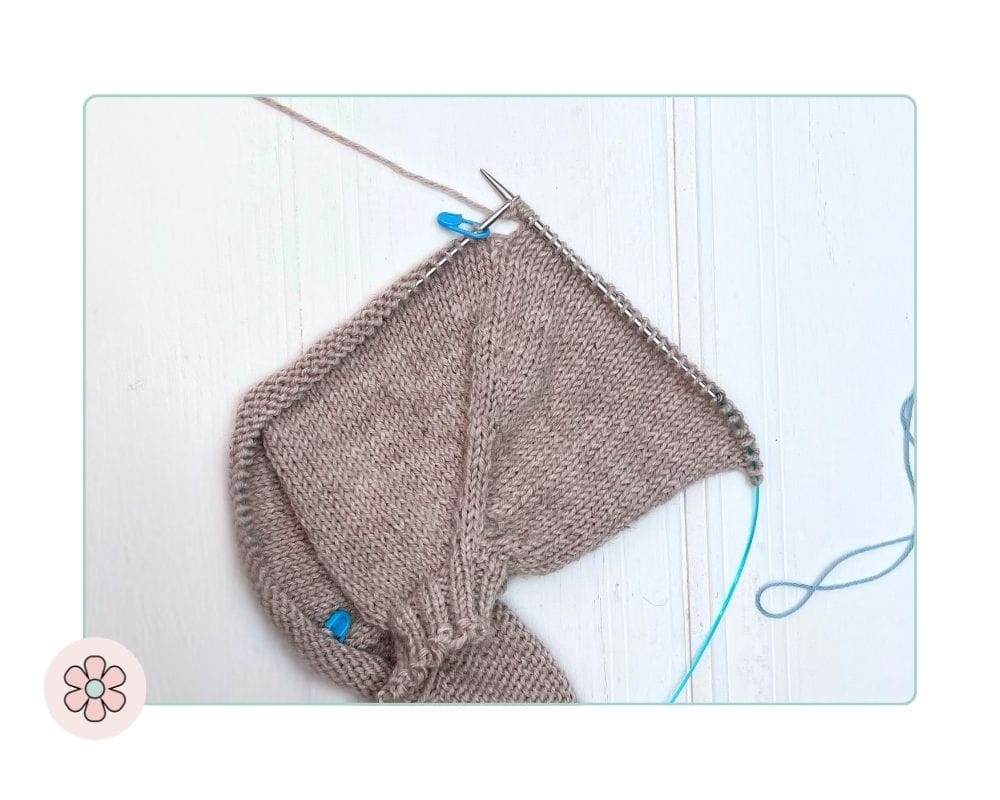
Image shows cable cast-on for underarm stitches on a top-down seamless children’s cardigan
Slide the sleeve stitches onto a length of scrap yarn. Do this between the first and second markers. Remove both markers as you go.
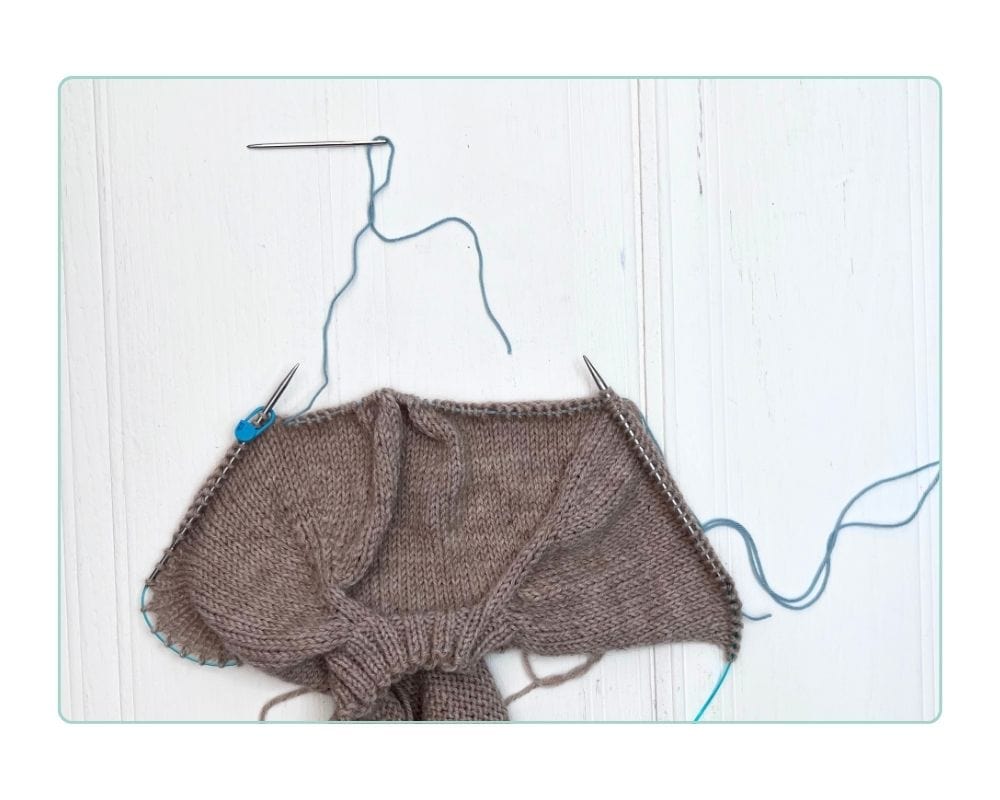
Image shows length of scrap yarn ready to hold sleeve stitches during the separation row of a top-down cardigan
When you reach the third marker, repeat the same process for the second sleeve.
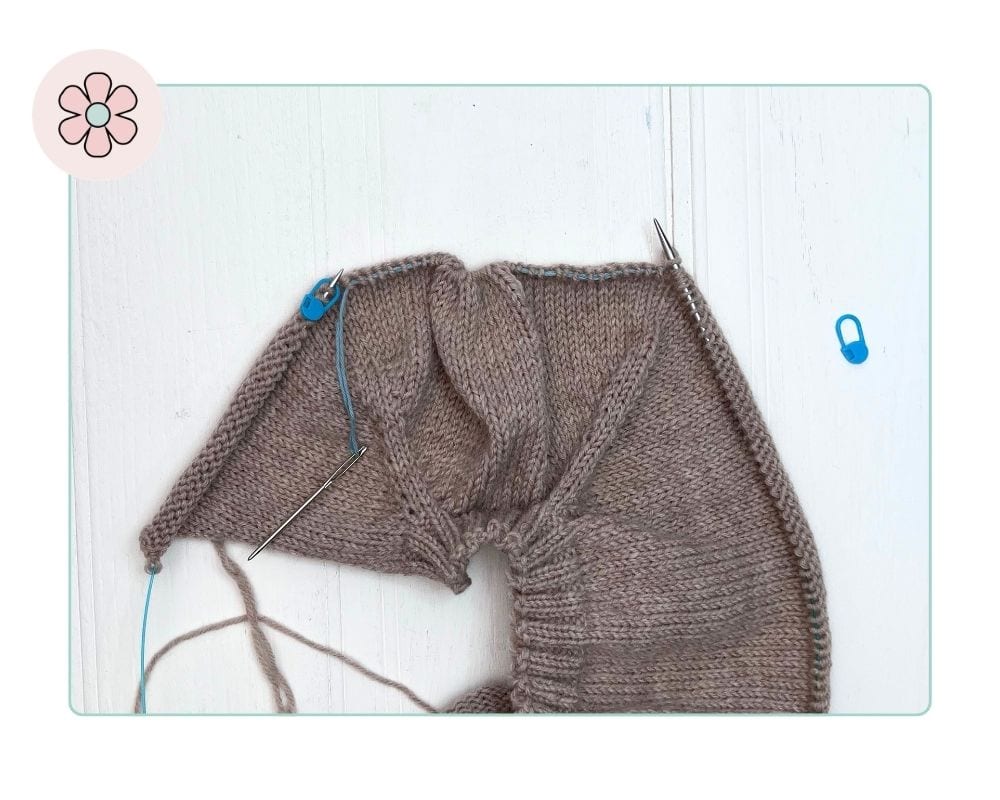
Image shows second sleeve stitches on waste yarn
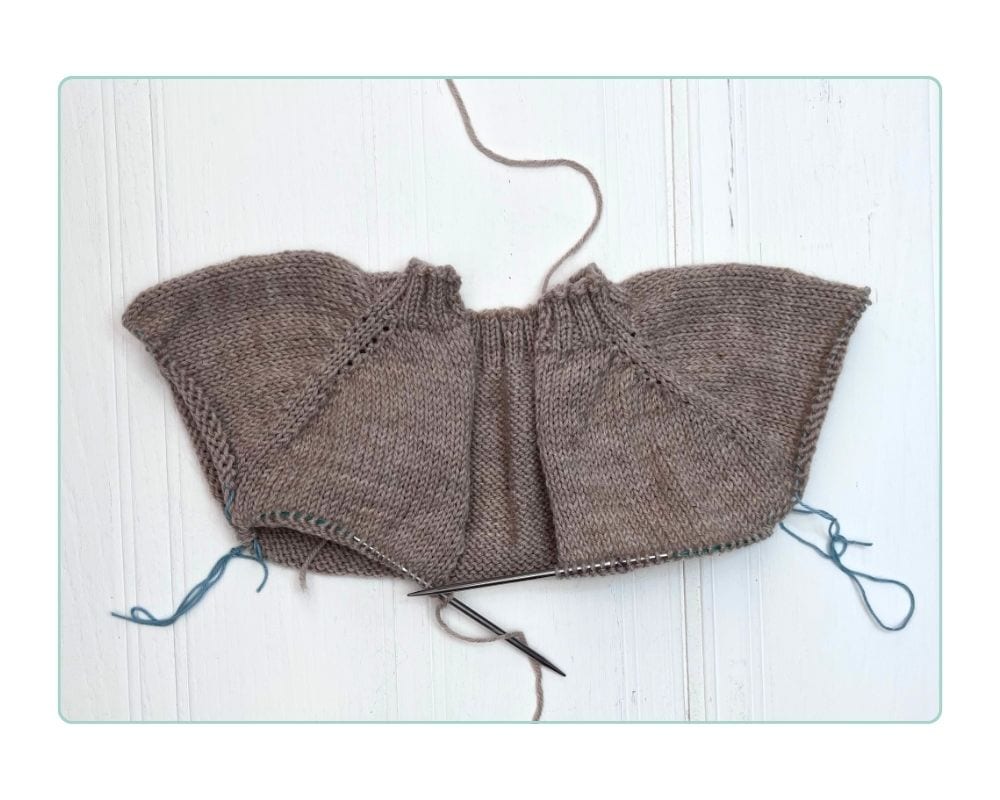
Image shows both sleeves held on waste yarn with body stitches on the needle, ready to work the body of a top-down cardigan
At the end of this row, both sets of sleeve stitches are resting on waste yarn and only the body stitches remain on your needle. The sleeves aren’t going anywhere. You’ll come back to them.
Step 5: The Body
I have not shown the body being worked on in the photos, there is no shaping it is just some nice simple stocking stitch to relax and knit.
Sometimes I leave the body stitches on hold and work the sleeves next. You will see in the following photos that the body is not complete before I work the sleeves. I like to do this as it reduces weight in the piece when I am working the sleeves with their shaping.
Work the body flat, back and forth on your 4mm circular needles. The body is worked in stocking stitch. Dachshund in the Snow uses side seam markers to help track charted stitches, which the pattern details for each size.
Continue until the body reaches the correct length, measured from the underarm.
Change to your 3.25mm needles for the hem ribbing and work ribbing to match collar. Cast off loosely in rib. A little tip for keeping that cast off loose, use your 4mm needle.
At this point you have a complete cardigan body. No seams. The sleeves are waiting.
Step 6: The Sleeves
The sleeves are worked in the round. Transfer the held sleeve stitches from the waste yarn back onto your 4mm needles. Start at the centre of the underarm cast-on.
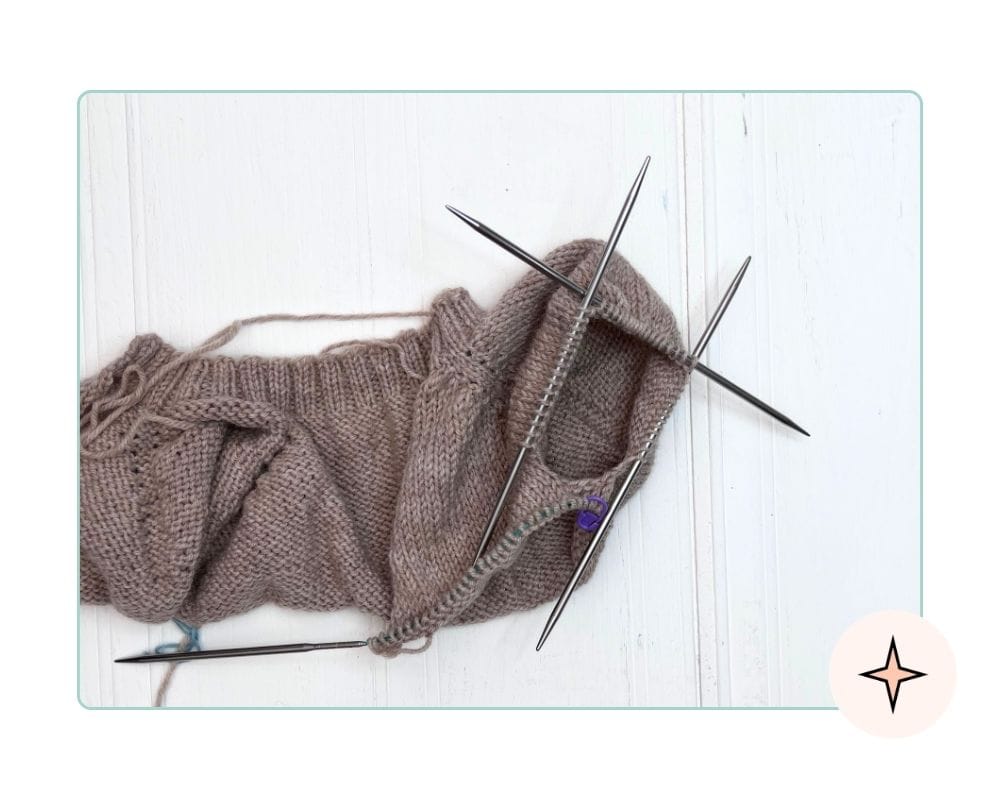
Image shows sleeve stitches returned to needle from waste yarn, with underarm stitches picked up, ready to work the sleeve in the round
Pick up and knit the underarm stitches, picking up from each end of the underarm cast-on, then continue along the held sleeve stitches. Place a marker at the centre underarm to mark the beginning of the round.
Work in stocking stitch in the round (knit every round), decreasing as set in the pattern.
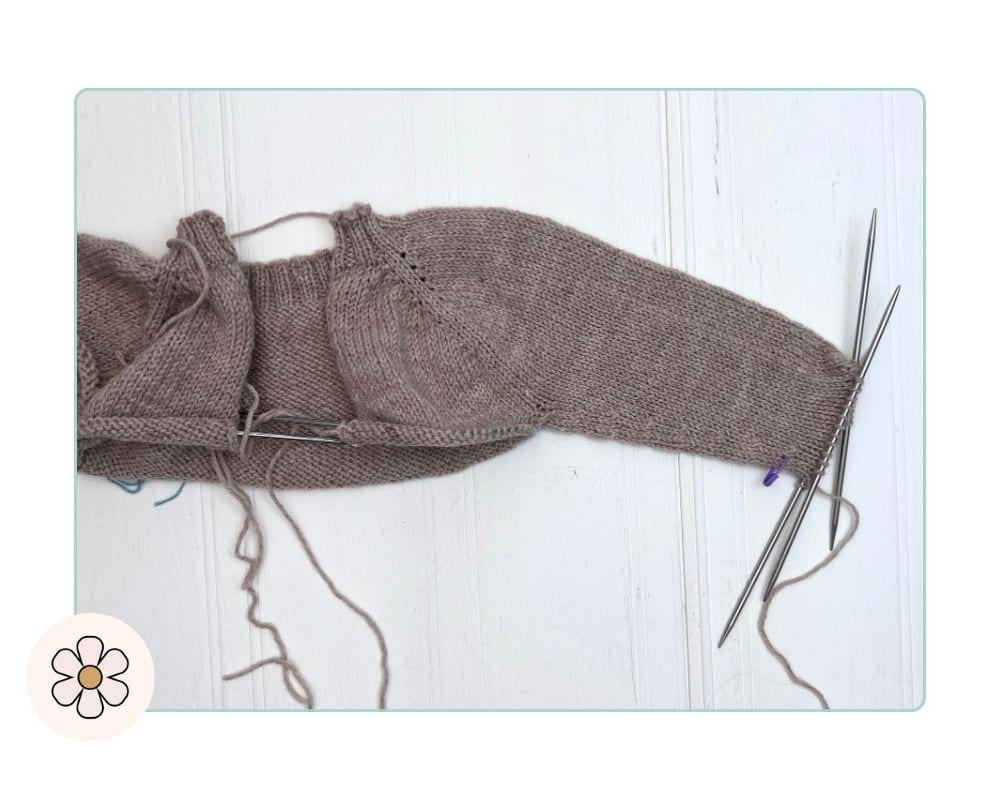
Image shows sleeve decreases complete on a top-down children’s cardigan, cuff stitches on needle ready for ribbing
Top Tip
When working a contrasting colour ribbing, always work one round in the new colour before working any ribbing. Next work the ribbing, you will not see those pesky little blips of the previous colour showing through.
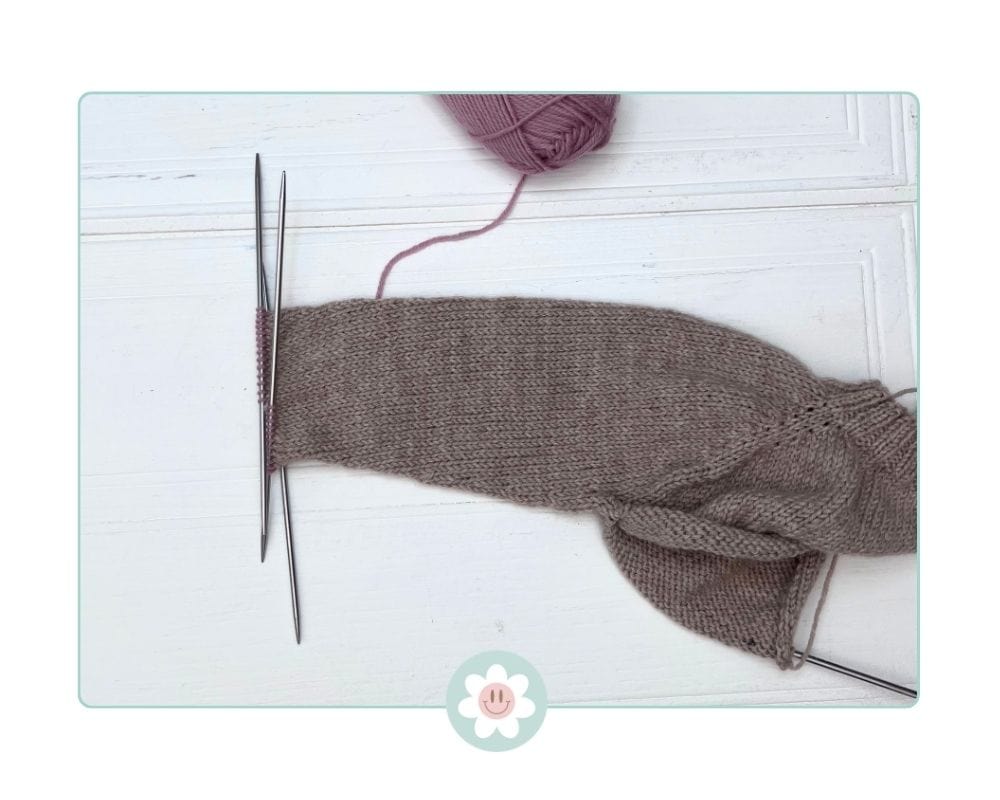
Image shows one round of contrasting colour ahead of ribbing on a top-down children’s cardigan, cuff stitches on needle ready for ribbing
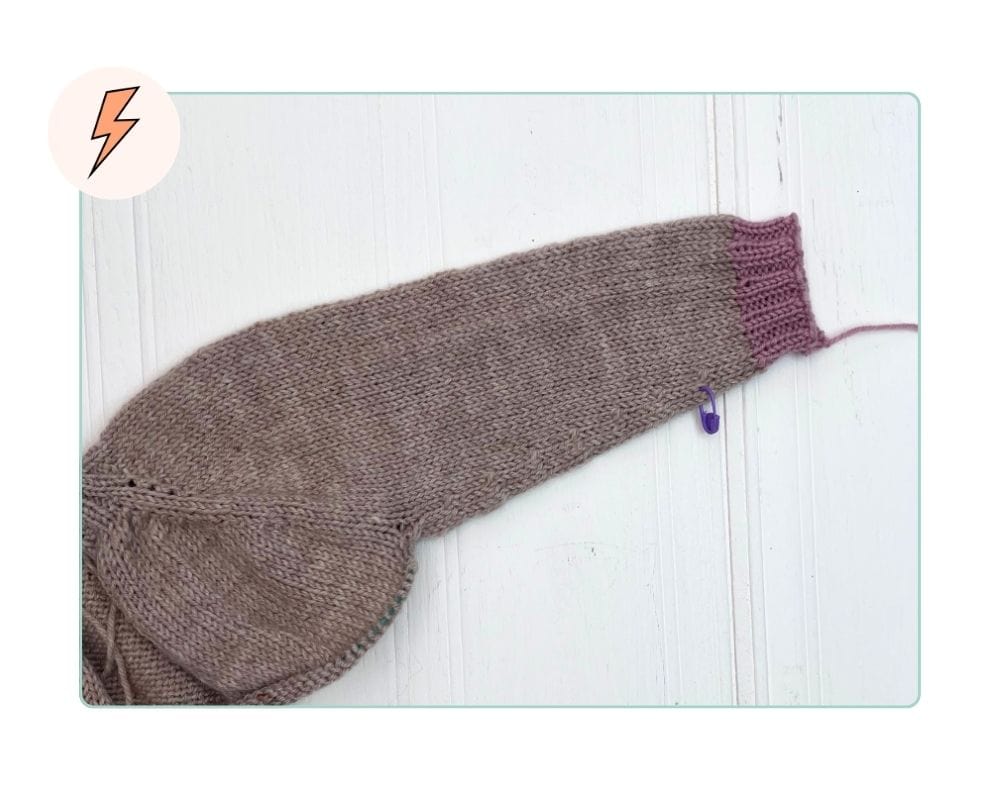
Image shows completed cuff ribbing in contrast colour on a top-down seamless children’s cardigan sleeve
Work the second sleeve to match.
What Should I Do Next?
You now have a complete cardigan body with both sleeves attached and finished. All that remains is the button band and buttonholes, which run up both front edges. The button band instructions are in your pattern, you have probably knitted seamed cardigans before and are no stranger to buttonbands. If you would like a guide on picking up button bands and working button holes, let me know in the comments.
Hints and Tips for Button Bands
Divide the front edge of the garment into four equal sections using stitch markers. Then divide the amount of stitches you need to pick up for your size by 4. This will give you the amount of stitches to pick up in each of the four sections. Much easier than trying to pick up all the stitches in one pass and running out of space!
When picking up stitches using DK weight yarn at the tension given for Dachshund in the Snow, I generally pick up two stitches for every three rows.
Always cast off loosely in ribbing as set.
My Top-Down Children’s Cardigan Patterns
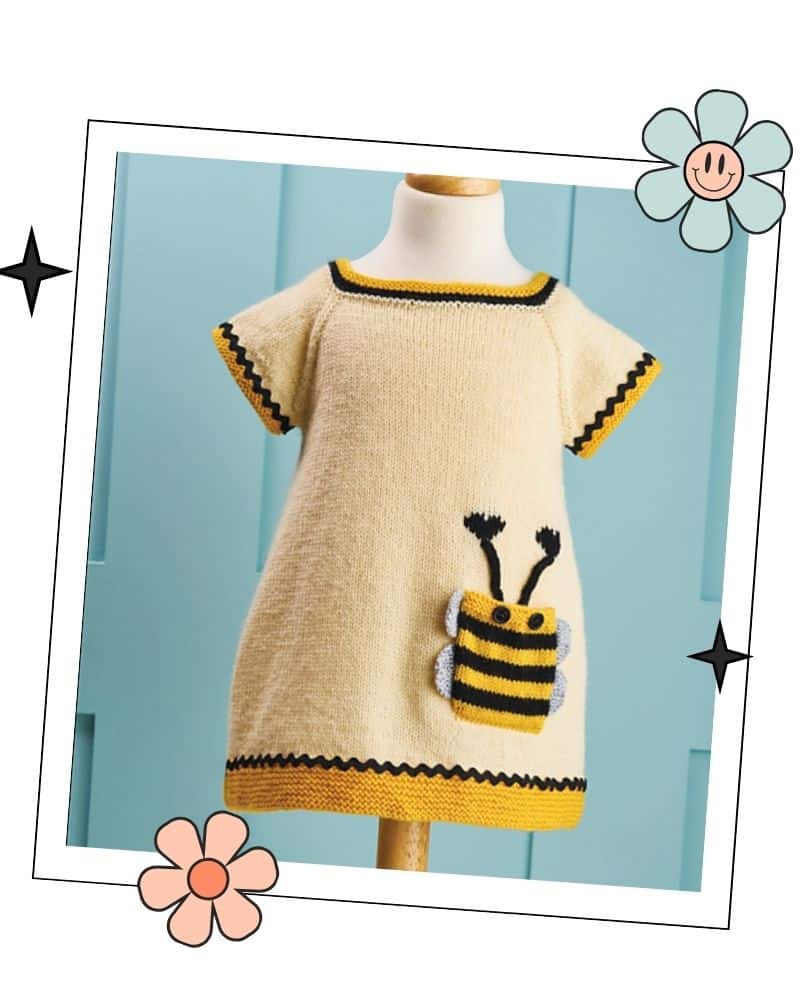
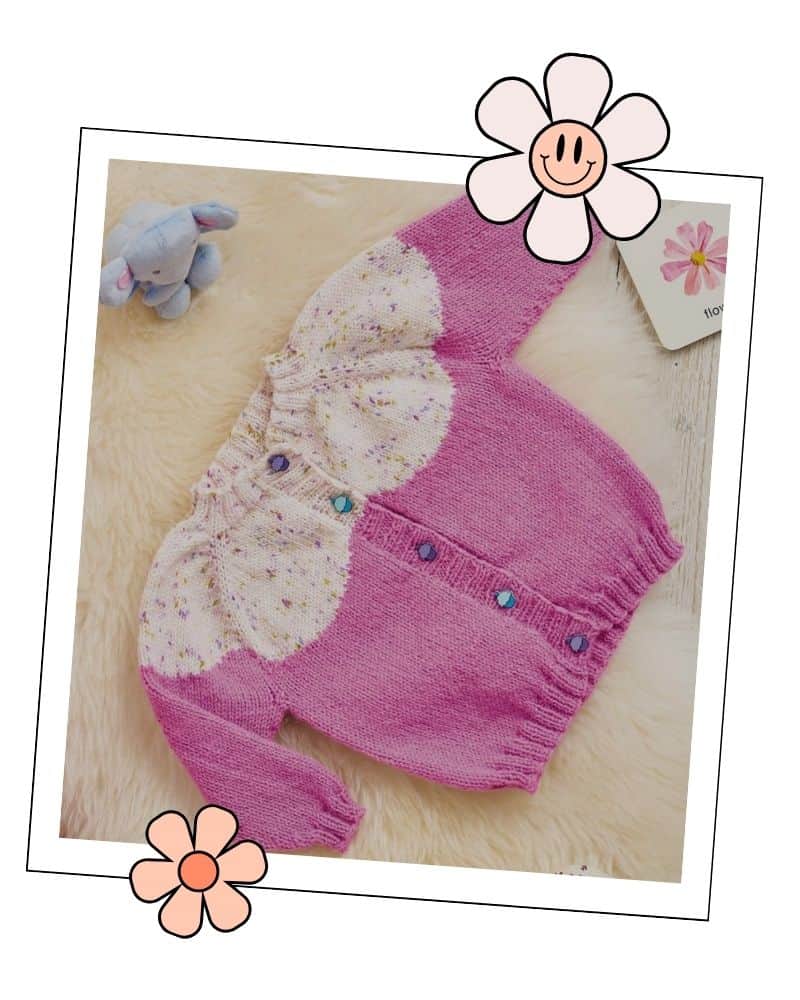
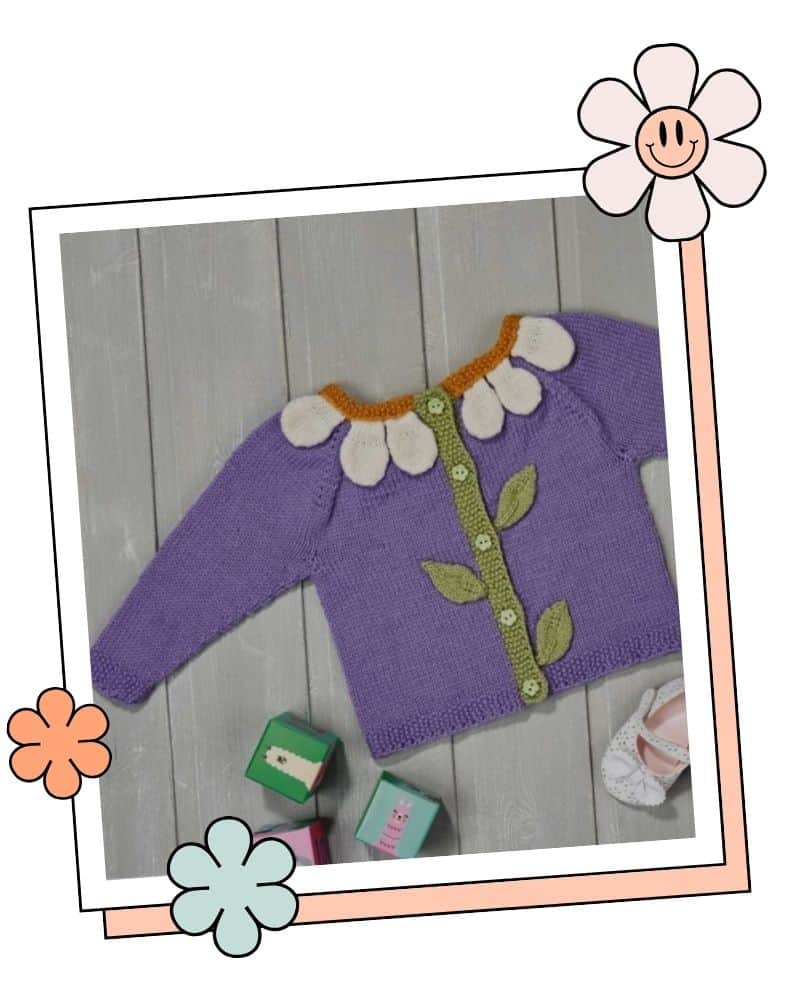
If you’d like a pattern to work alongside this guide, here are a few of my seamless top-down designs for babies and children. They range from 0–6 months through to 10–11 years and use the same raglan construction method described here. I highly recommend starting with either Incy Wincy Spider Cardigan or the Bee Happy Dress.
FAQ About How to Knit a Top Down Cardigan for Kids
How do I knit a top down cardigan for kids if I’ve never done seamless construction before?
Start here. This guide covers every stage with photos, so you can see what the work looks like at each point. You need to be comfortable knitting, purling, and working a basic increase. Everything else is explained. If you’d like a pattern to work alongside it, Dachshund in the Snow Cardigan is designed with first-time top-down knitters in mind.
What is a top-down knitting pattern?
A top-down knitting pattern starts at the neckline and works downward to the hem. For a cardigan, this means casting on at the collar, growing the yoke by increasing at raglan points, then separating the sleeves and working the body and sleeves individually. It’s called seamless because the raglan seams are built in as you knit rather than sewn at the end.
What size cardigan should I knit for a 3-year-old?
It depends on how the child is built and how much growing room you’d like. My Baby and Children’s Knitting Size Guide covers chest measurements by age and explains how to choose between sizes. As a starting point, most 3-year-olds fall into the 2–3 years or 4–5 years sizing for Dachshund in the Snow. If in doubt, go up a size.
What does KFB mean?
KFB stands for knit into the front and back of the same stitch. It creates one extra stitch and leaves a small decorative bump on the right side of the work. In top-down raglan construction, KFB is worked consistently at each marker throughout the yoke. Very Pink Knits has an excellent video demonstrating KFB stitch.
Why does my chart look upside down when I’m knitting it?
Because this is a top-down garment, any colourwork or intarsia motif you work in the yoke will appear upside down on the needles as you knit it. This is correct. The chart reads from the neck downward, which is the opposite direction to how you’d read a chart on a bottom-up garment. When the cardigan is finished and held the right way up, the motif will be the right way round. Knit it exactly as the chart instructs and trust what you see on the finished piece, not on the needles.
You can do this!
If you’ve been putting off a top-down pattern because you weren’t sure what it would look like in practice, I hope this helps. Please share your finished projects with me.
Stay in Touch
If you would like new patterns, free resources, and the occasional dry observation about knitting for children delivered straight to your inbox, you can join the list here:
You can also find me on Pinterest, Instagram, and Facebook
About Jane
Jane Burns is a UK-based knitting and crochet pattern designer with 18 years of experience, specialising in whimsical, characterful patterns for babies and children. She is the founder of Jane Burns Whimsical Children’s Knits, with patterns that carry real personality and a focus on making knitting feel accessible, satisfying, and a little bit special.