Not that I thrive on leaving things to the last minute, but I needed a Christmas jumper for an event I was attending, and that’s how this free knitted Christmas star pattern came about.
I had hit the shops, but there was nothing I loved enough to spend money on. So I thought, oh, I will knit some stars and sew them on. I took to Pinterest to find something quick and easy, and all I could find were 3D plush stars or complicated stars worked sideways with lots of picking up stitches. I did not have time for this!
Out came the needles, and a few attempts (and a small pile of stars) later, I had a little star I was happy with.
I have since used these stars as gift tags and tree decorations, using spray starch. The instructions are in the pattern below.
Quick Look
What you’ll find in this post:
- The complete free knitted Christmas star pattern
- Materials, needles and tension, with US sizes
- The abbreviations used, with a link to my full guide
- Seven step by step photos, from cast on to hanging loop
- Ways to use your stars, from school jumpers to teacher gifts
- A link to the printable PDF if you would prefer one
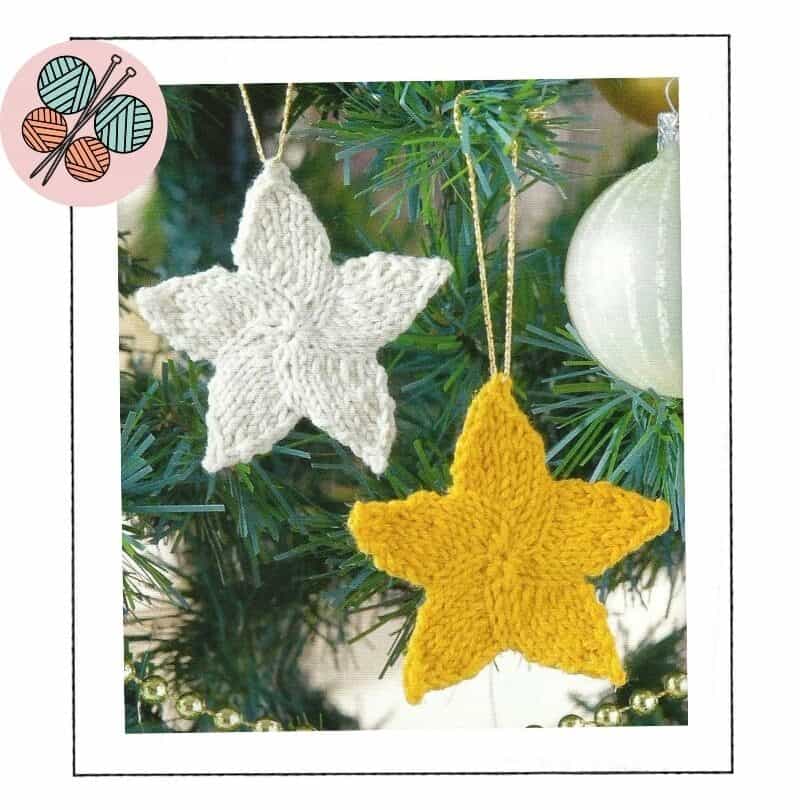
Prefer to print it? The free pattern is all here on the blog, but if you’d like it without the adverts, the printable PDF version has all seven steps and photos on a few tidy pages, ready to pop in your knitting bag.
About This Free Knitted Christmas Star Pattern
This little star is flat, so there’s no stuffing and no sewing up. It starts in the round on double pointed needles, and once you have 35 stitches you work each of the five points back and forth on 7 stitches at a time.
The pattern is broken into seven photographed steps, so you can see exactly what your star should look like at each stage, scrunched up bit included.
The pretty swirl in the centre comes from the increases. Each round, the increase moves along by one stitch, so the shaping does the decorating for you.
One star takes about 20 minutes and around 10g of yarn, which makes it a very good use for those odd little balls you can’t bring yourself to throw away.
A quick note if you prefer straight needles: the centre of this star is worked in the round, so you will need double pointed needles, or a long circular needle if you like the magic loop method. The points are worked back and forth, so it’s only the first few rounds that need them.
What You Need
Needles
3.25mm (US 3) double pointed needles, or your preferred needles for working small rounds
Yarn
These stars work well in any yarn. My samples are worked in DK weight yarn using oddments from my stash, about 10g per star. The sparkle versions are worked in King Cole Glitz DK in Champagne. If you can’t get King Cole where you live, any DK (light worsted) yarn with a metallic thread will give you the same festive sparkle.
Also needed
Pins for blocking
Spray starch
Tapestry needle
Yarn or gold thread for the hanging loop
Tension
25 sts x 34 rows = 10cm x 10cm (4in x 4in) using 3.25mm (US 3) needles and stocking stitch.
Tension (gauge) is not essential for this project, but it will affect yarn quantities and finished size. Keeping your tension tight helps the star hold its shape when starched.
Finished size
7cm (2.75in) wide
Skill
Confident Beginner
Abbreviations
These are the abbreviations used in this pattern. If any of them are new to you, my Knitting Abbreviations Guide explains every term you’re likely to meet in a pattern.
| Abbr. | Meaning |
|---|---|
| CDD | Central double decrease. Slip the next 2 stitches together as if to knit them together, knit the next stitch, then pass both slipped stitches over together. Two stitches decreased. |
| k | Knit |
| p | Purl |
| m1 | Make one stitch (see my note on increases below) |
| sl1 | Slip 1 stitch |
| k2tog | Knit 2 stitches together |
| psso | Pass slipped stitch over |
| RS | Right side |
| st(s) | Stitch(es) |
| DPNs | Double pointed needles |
Alternatively, you can work sl1, k2tog, psso in place of each CDD, although the centre line of each point will lean slightly.
A note on increases: I recommend using a yarn over increase and closing the yarn over on the next round. This stops the piece being pulled out of shape by stacking increases on top of each other.
Before you cast on, if you’d like more quick knits like this one, plus free patterns and the occasional dry observation about knitting, join my newsletter and they’ll land straight in your inbox.
How to Knit a Christmas Star, Step by Step
I’ve photographed each stage so you can check your star against mine as you go. Each step has the pattern instructions first, then a little note on what you should be seeing.
Step 1: Cast on and join in the round
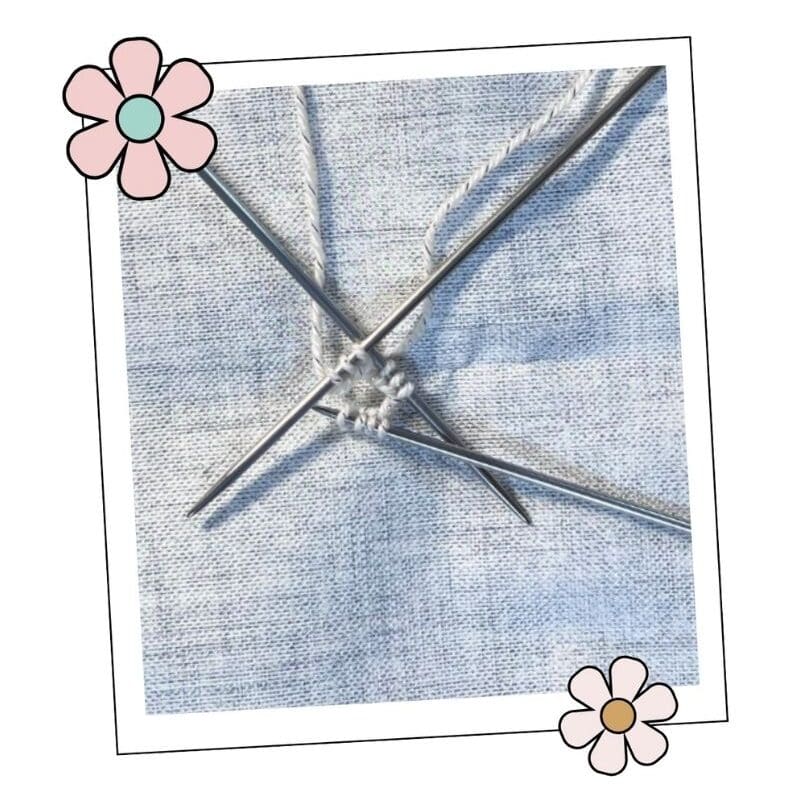
Using the long tail cast on, cast on 10 sts and divide over 3 DPNs. Join to work in the round, taking care not to twist.
Ten stitches over three needles is fiddly for the first round or two, so don’t worry if it feels awkward. Once you have a few rounds on the needles, it settles down.
Step 2: Work the increase rounds
Round 1: Knit
Round 2: (K2, m1) five times [15 sts]
Round 3: (K3, m1) five times [20 sts]
Round 4: (K4, m1) five times [25 sts]
Round 5: (K5, m1) five times [30 sts]
Round 6: (K6, m1) five times [35 sts]
Each round, the increase moves along by one stitch. That’s what creates the swirl in the centre of your star, so you should start to see it forming after a few rounds.
Step 3: Knit the first point
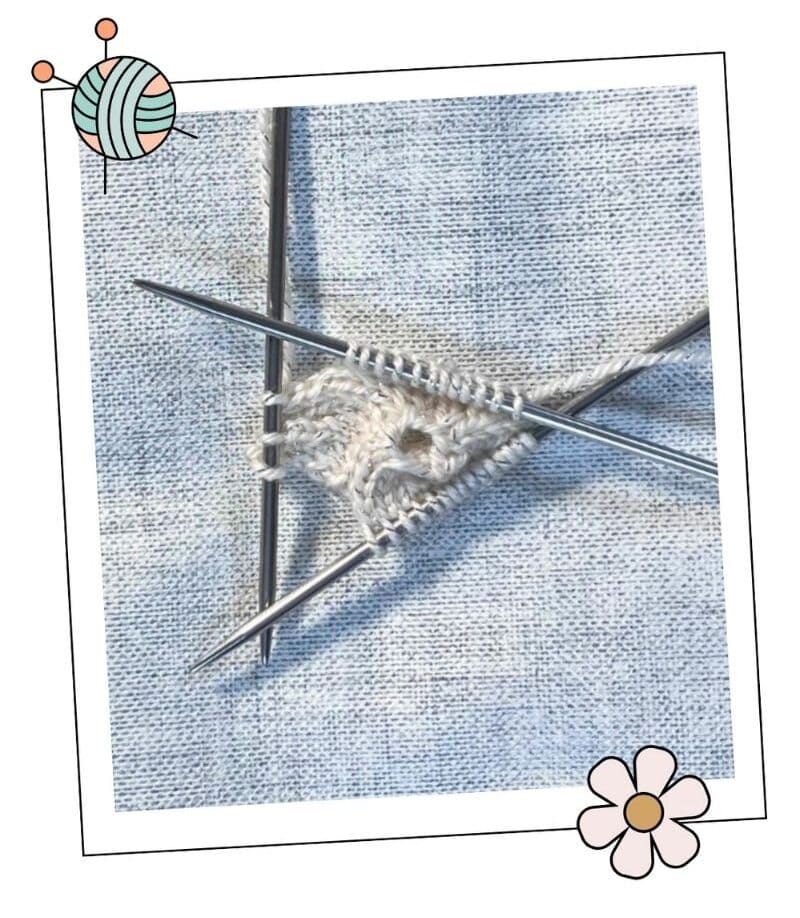
The point (tip) of each star is worked separately, working back and forth on 7 stitches at a time as follows:
*Row 1: K7, turn.
Row 2: P7, turn.
Row 3: Sl1, k1, CDD, k2. [5 sts]
Row 4: Purl.
Row 5: Sl1, CDD, k1. [3 sts]
Row 6: Purl.
Row 7: CDD. [1 st]
Fasten off.*
Leave the other 28 stitches waiting on the needles while you work. The CDD keeps a neat line running up the centre of each point.
Step 4: Rejoin the yarn and knit the remaining points
With RS facing, rejoin yarn to the next 7 sts and repeat from * to * for the remaining four points.
Step 5: Weave in your ends
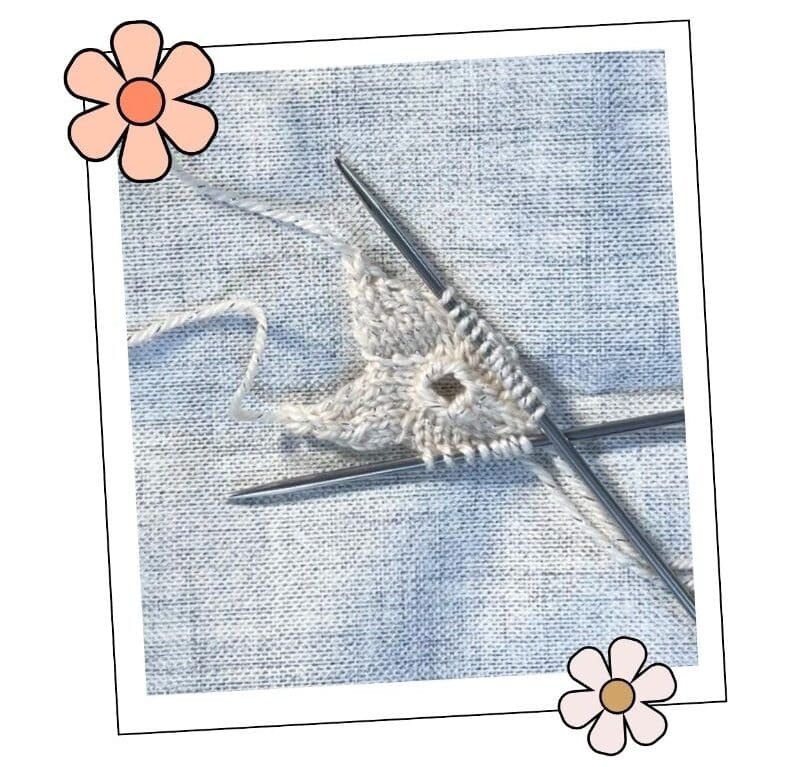
Weave in ends.
Don’t worry, your piece will look scrunched up when you finish. The magic happens when you block and starch your star!
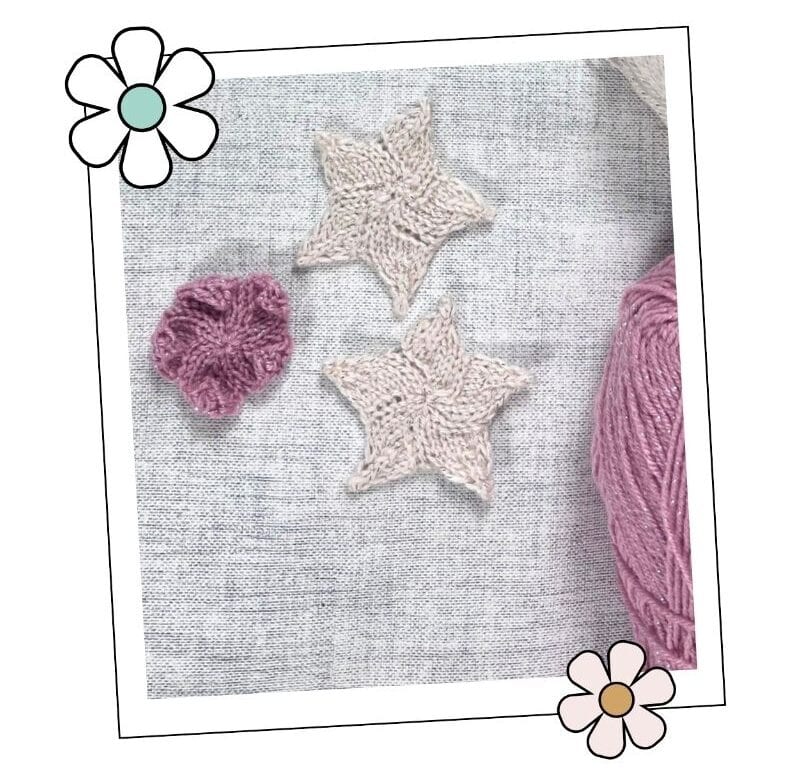
Step 6: Block and starch
Pin out on a blocking board and spray with starch. You may need to spray twice, allowing it to dry between applications.
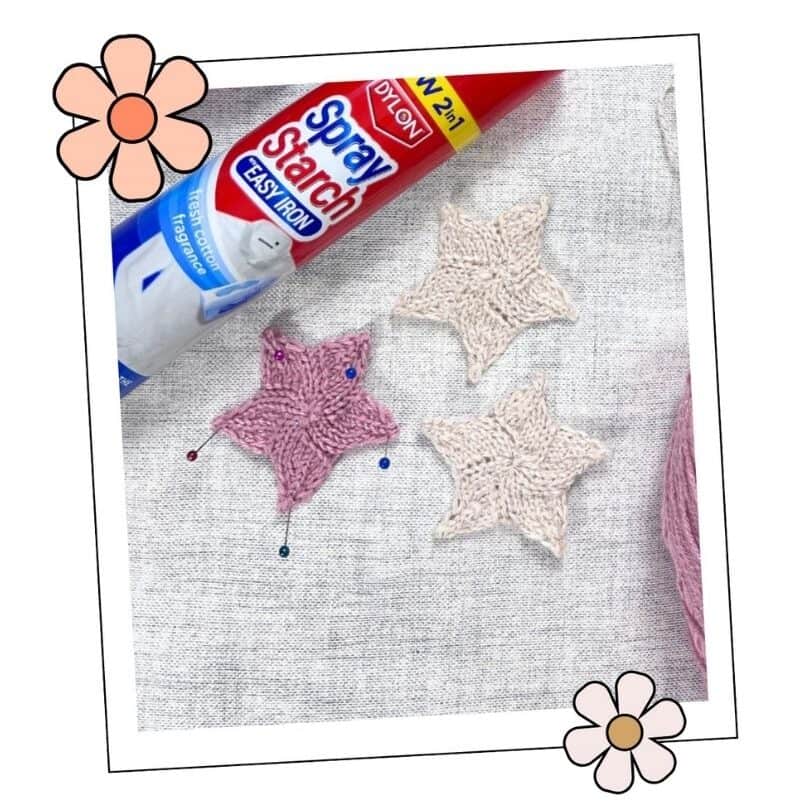
Making these with the kids? Blocking and starching is the fun part, but an adult should supervise the spray starch and the blocking pins. The finished star is a decoration, not a toy. For more on keeping handmade items safe around children, the UK Hand Knitting Association safety guidance is well worth a read.
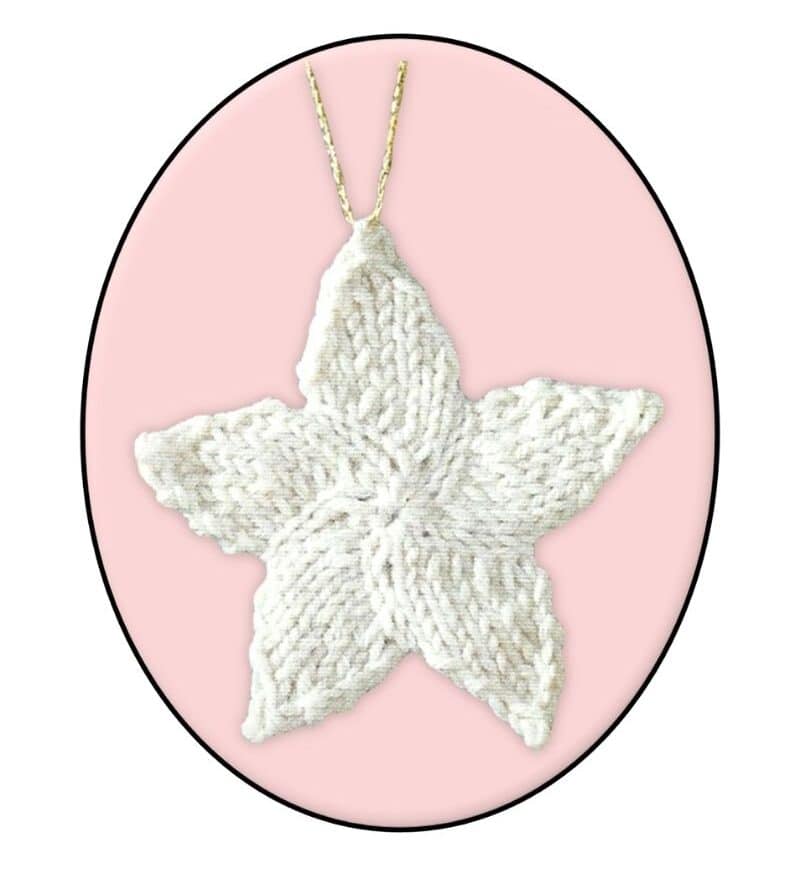
Step 7: Add a hanging loop
Make a loop from yarn or gold thread to hang from the tree.
Mix It Up:
Ways to Use Your Free Knitted Christmas Star Pattern
- A last minute Christmas jumper. Sew a few stars onto a plain jumper for an event or a Christmas jumper day at school. Skip the starch for anything you wear, a gentle steam block is all it needs.
- Gift tags. Tie a star onto your parcels instead of a bow. It’s a tag and a little extra gift in one.
- A gift for teacher. At about 20 minutes and 10g of yarn a star, you could knit one for every teacher in the school without raiding the yarn budget.
- Add some sparkle. A metallic yarn such as King Cole Glitz DK turns a simple star into something very festive.
- Try a different yarn weight. Check the recommended needle size of your chosen yarn and go down one needle size to keep the tension tight. Thicker yarn makes a bigger star. You can check yarn weights on the Craft Yarn Council’s yarn weight chart.
Download the Free Knitted Christmas Star Pattern PDF
The pattern is free here on the blog, but if you’d like a copy to print and keep in your knitting bag, without scrolling past the adverts, the Five Pointed Star PDF is available in my shop. It includes step by step photos and the full instructions on a few tidy pages.
Looking for more festive knits? My Best Christmas Knitting Patterns round up has your all time favourites, and the mini sweater ornaments would look lovely on the tree next to your stars.
Frequently Asked Questions
Can I knit this star on straight needles?
The centre of the star is worked in the round, so you’ll need double pointed needles or a long circular needle for the magic loop method. Once you reach the points, you’re working back and forth on 7 stitches at a time.
How do I knit a star as a beginner?
This star is ideal for a confident beginner, and the step by step photos show you what your star should look like at each stage. If you can knit and purl and you’ve tried double pointed needles, the only new stitch is likely to be the central double decrease, and that’s explained in the abbreviations.
How much yarn does one knitted star use?
About 10g of DK yarn per star, so it’s a perfect way to use up oddments from your stash.
Can I use a different weight of yarn?
Yes. Check the recommended needle size for your yarn and go down one needle size to keep your tension tight. A thicker yarn will give you a bigger star.
How do I make my knitted star stiff?
Pin it out on a blocking board and spray with starch. You may need to spray twice, letting it dry between applications.
Can I sew a knitted star onto a jumper?
Yes, that’s what I designed it for. Don’t starch stars you’re sewing onto clothes, a gentle steam block is enough to flatten them.
Your Star Is Ready to Shine
Twenty minutes, a scrap of yarn and a little spray starch, and you have a decoration you’ll bring out every Christmas. Knit one, and I suspect you’ll find yourself with a small pile of stars too.
If you knit one, I would love to see it. Share a photo on Instagram and tag me, #janeburnsdesigns.
Stay in Touch
If you would like new patterns, free resources, and the occasional dry observation about knitting for children delivered straight to your inbox, you can join the list here:
You can also find me on Pinterest, Instagram, and Facebook.